Build a website with Google Firebase from Scratch
Back in our college days, when the IT training started with learning the basics of HTML, CSS and JS students were very much enthusiastic to develop their own website. But due to the lack of a proper hosting solution, it was not easy for everyone to deploy their custom website with a custom domain on the web.

Google in recent times has made it very much easier and has become one of the top hosting solution providers in the world, providing the best solutions to its customers. And the amazing part is that it's FREE of cost!
Pre-Requisites:
1. Node (v 8.0 or above ) — Installation Guide
What is Firebase?
Firebase is a mobile and web development platform that enables developers to build mobile and web applications along with many other built-in features that are ready to be used in the application. This includes Authentication, Realtime No-SQL Database Management, Hosting, Analytics, Testing and most importantly the ML Kit. The best thing about this infrastructure is that it is backed up by Google and it scales as your business grows.
To Get Started — (https://firebase.google.com)
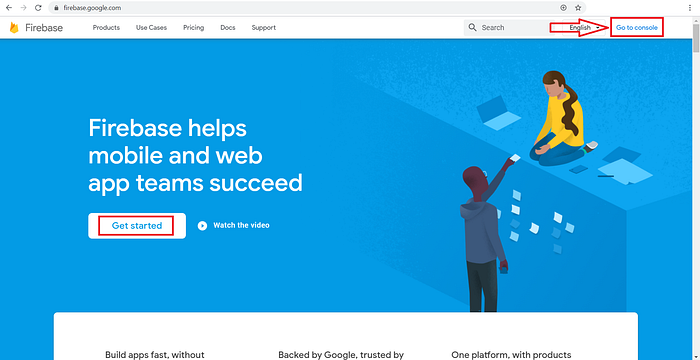
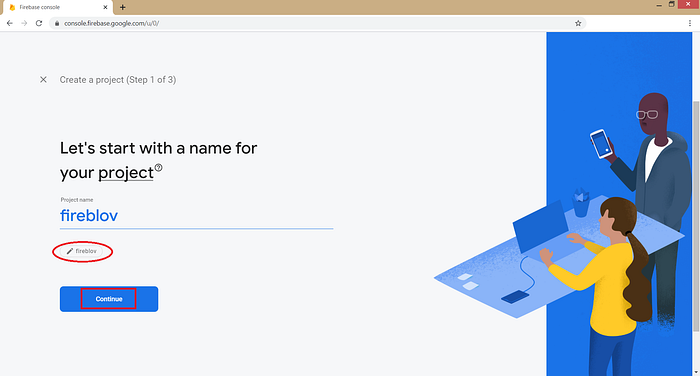
Step 1: Click on Add Project / Write the project name.
NB: Make sure that you don’t get any random string with your project name in the oval-shaped marker item below.
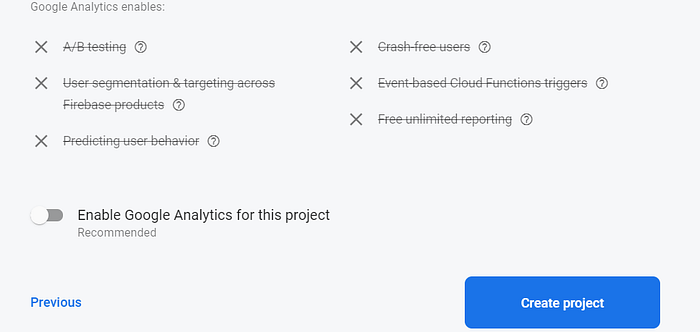
Step 2: Google Analytics setup may be done (if required). This tutorial doesn't focus on analytics so we will just disable the same for now and click on Create Project.
Then click on Continue to find yourself inside your project’s dashboard.
NB: Note the URL of the project that you are into right now. Keep a bookmark of the same for safekeeping purposes. It can always be found in the console area of Firebase.
STEP I : Console Hosting Setup
Click on the Hosting in the left-sidebar pane to continue with the hosting as shown in the figure below.

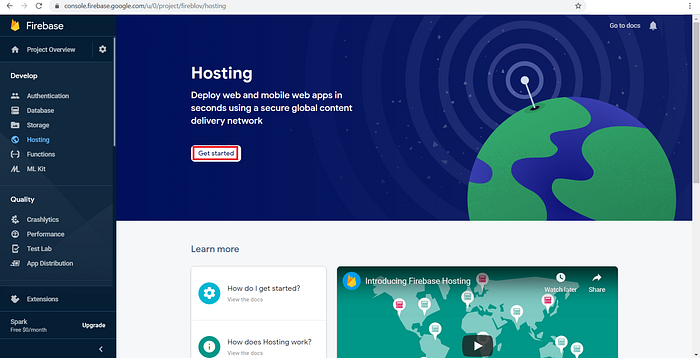
Click on Next twice followed by Continue to Console.
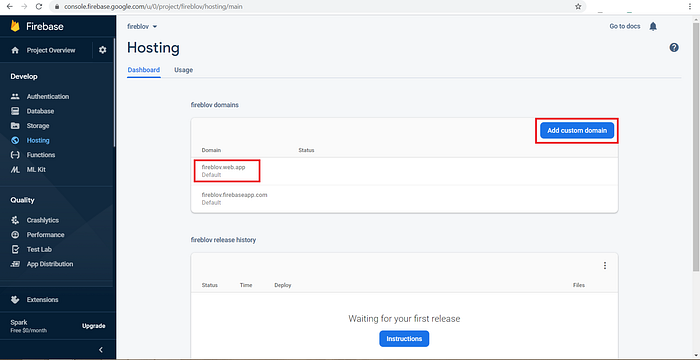
As you can see your hosting is up now and is ready to show your website. There is also an option to connect your custom domain to your Google web app.
STEP II: Firebase Local Setup
Now since we have already configured npm on our machine, we start with the global installation of firebase-tools on our machine.
Open a command window on the desktop using “Shift + Right Click”, “Open Command Window Here / Open PowerShell Here”.


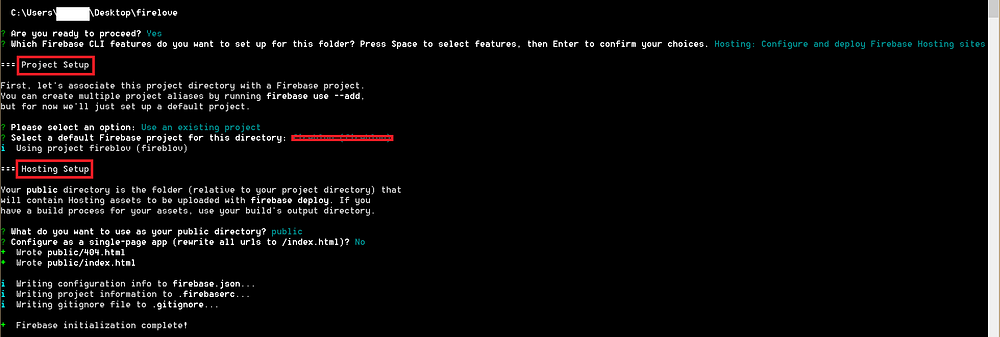
- What do you want to use as your public directory? Just hit Enter.
This public directory will be used to store all your HTML and CSS. - Configure as a single-page app (rewrite all URLs to /index.html)? N
( We will learn about this later in another SPA - Single Page Application tutorial.)
STEP III : Write your own HTML / CSS

Feel free to edit the index.html inside the public folder as per your choice.
Also, feel free to add more HTML and CSS files to the public folder.
If you want to build your resume. I recommend using this awesome HTML Template to get started. Click here to Download.
STEP IV : Deploy
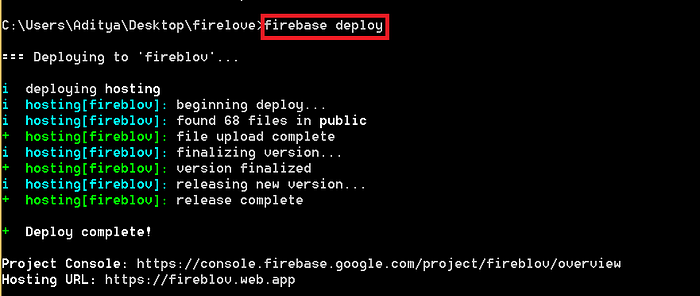
firebase deployUse the command to deploy your website.
Link to the website is the Hosting URL that is mentioned in the image above after the deployment is complete.
STEP V : Connect to custom domain ( Optional )
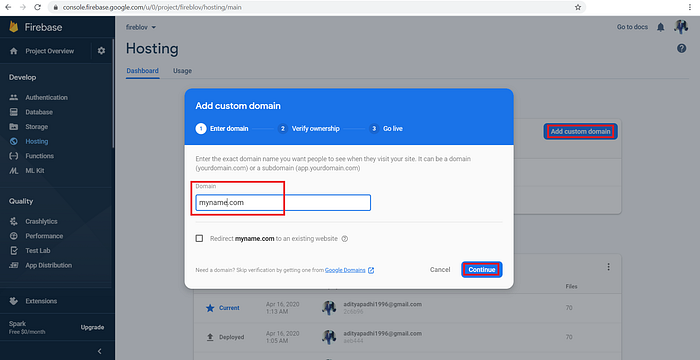
Also, add your custom domain to this website using the Firebase console.
Thank You. Hope you enjoyed the tutorial. I will be coming up with the frontend and backend programming tutorials on this website as soon as possible. Keep supporting.
If you liked this tutorial do like share and comment on how I can improve this tutorial series.
